The previous two years I have worked as a marketing person for Jeveka, a technical wholesaler in fasteners and tools. We’re talking about screws here mostly.
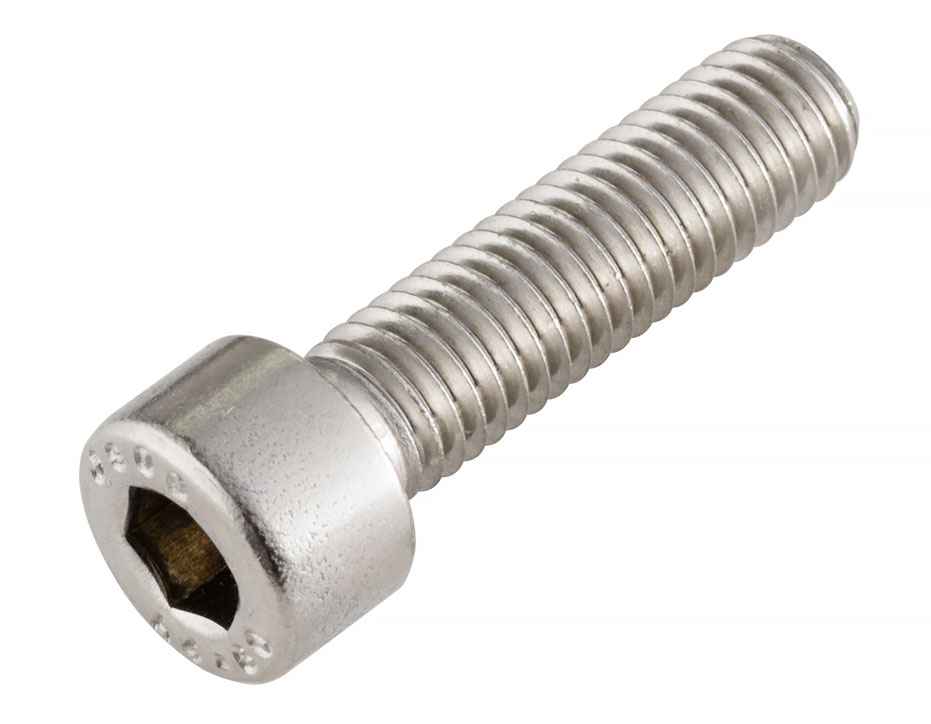
Important for the screw is the head, where you can see the screw drive type and markings if any. Also the fact that screws are round. This is clearly shown in the photographs for the catalog and the website shot in bulk. Here the screws are positioned diagonally and shot from a higher vantage point. This method was largely in place when I got there, the orientation of the screws is derived from the drawings that were previously used in the catalog. I improved the lighting to get some more contrast and clearer indication of the (round) shapes. I also changed the method to speed things up and guarantee more quality and consistency.
The standard way of photographing a screw
Jeveka has a nice DSLR setup with a Tamron 90 mm Macro of sufficient quality. Unfortunately even with the Macro at f/40 the subjects are not sharp everywhere. Focused roughly half way the screw the head and the tip are getting quickly out of focus (depending on display size). No problem for small images on the website or in the catalog, but on occasion I would like to be able to display the photographs of the screws larger. To get the whole screw in focus you should photograph them more or less parallel to the sensor. Which can result in a nice photograph of a screw, but it lacks information: the head is not seen and the roundness of the whole thing is not immediately obvious.

Photographing a screw with a viewcamera
Only recently I was able to snatch a 120 mm macro for my Cambo viewcamera for a reasonable price and since then I have been working on a satisfactory way to photograph a screw. I think I have it, except for the lighting on which I will keep working. For now I concentrated on the perspective.
I like the straight depicting of the screw, without much perspective, as seen with the large silver plated screw above. But I want to show the head clearly and that it is round. Fortunately using my Cambo Ultima 23D viewcamera all my wishes can come true. Here’s how:
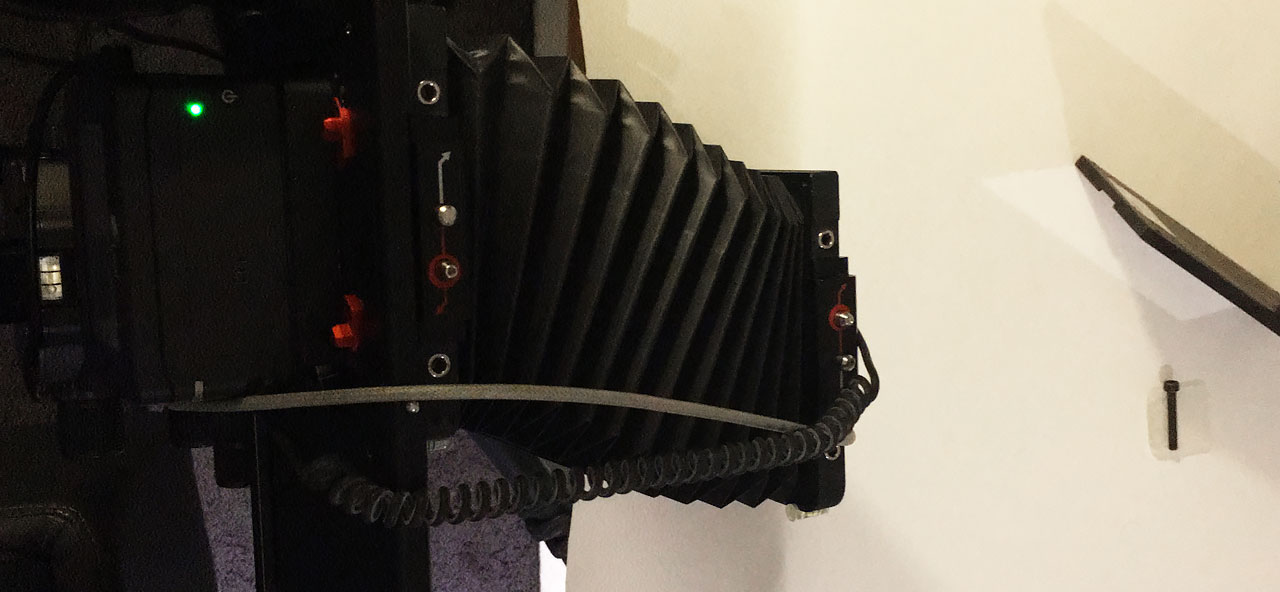
Basically I put the screw way off center so, from the camera’s viewpoint, you are looking at it on the head. This also shows clearly the roundness of the thread. Of course it is not visible from the camera if you put it that far to the right, but by shifting the front and back plates of the Cambo horizontally I get the screw into view. To see even more of the head, if necessary, I put the screw slightly diagonal and bring the whole screw back in focus by also turning the front plate in that direction .
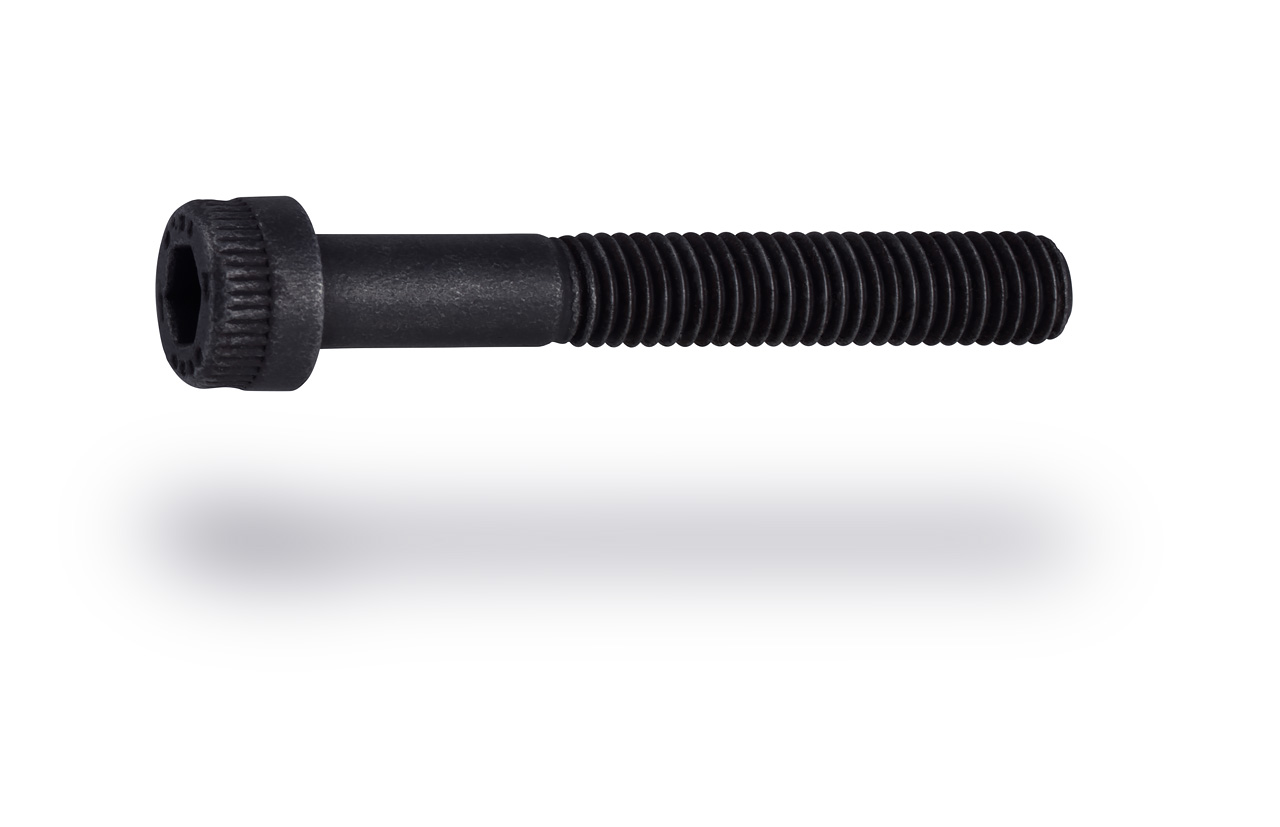
This way I can photograph a screw @ f/11 completely in focus for image sizes upto regular magazine spreads, roughly A3. Afterwards there is some Photoshop work of course: I clean the screw using the healing brush, cut the screw out using the pen tool, create the artificial shadow and do some contrast and color correcting, if necessary. And sharpening before output.
To photograph smaller screws with sufficient resolution I need a longer rail on my Cambo, this is on my wish list. Also the lighting was pretty basic during these experiments, with better lighting I could bring out the shapes more.
What’s your take on photographing a screw?